

Checking for print
Print-ready files: bleed, safe area and resolution
A few print terms explain most of what the editor and the print check tell you. The app sets the right values for each product, so you mostly need to know what they mean.
Trim, bleed and safe area
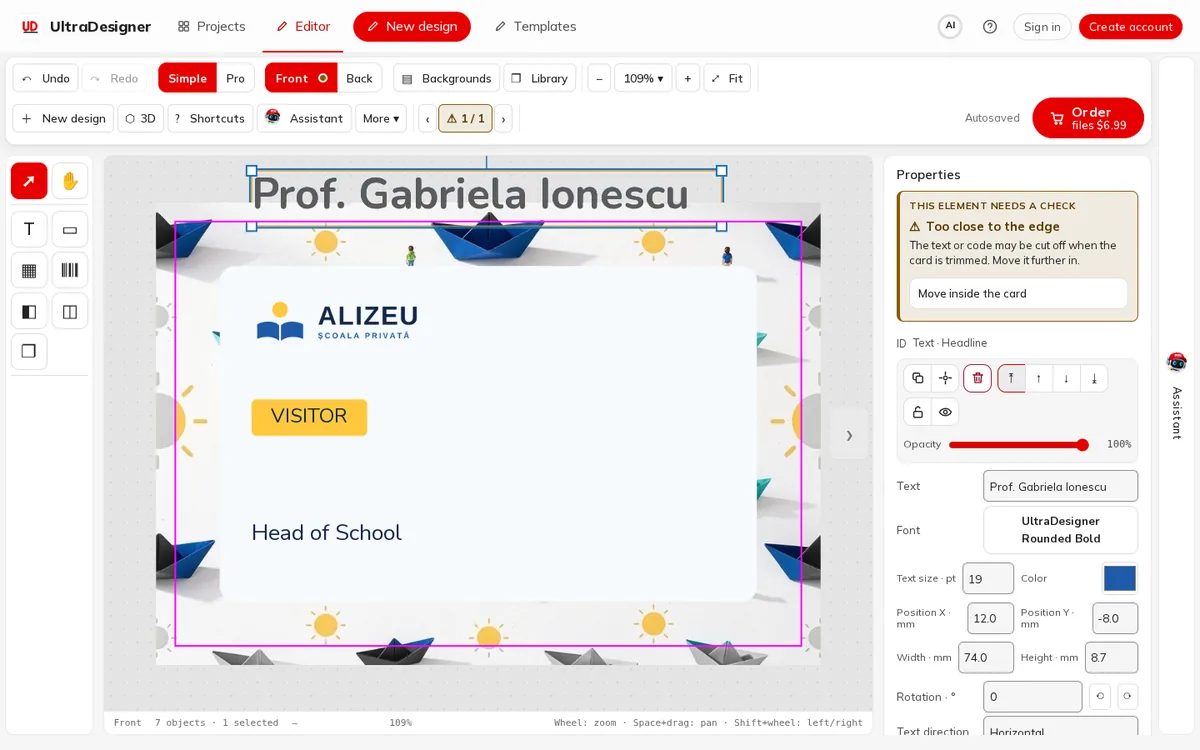
- Trim is the line where the printed sheet is cut to the size of the product. In the editor it is the magenta line.
- Bleed is the strip of artwork outside the trim line. Backgrounds and pictures that touch the edge should run into the bleed, so that no white edge shows if the cut is slightly off.
- Safe area is the zone inside the trim line where text, logos and codes are safe from the cut. Keep everything important inside it.
Each product has its own bleed and safe area; the app sets them when you choose the product. In Pro mode you can show or hide the Bleed, Trim, Safe area and Rulers guides.
Picture resolution
Resolution is how many pixels a picture has for each inch of printed size (dpi). A small photo stretched over a large area prints blurry. The app checks every picture at the size it has on the design:
- In the app's own words: Pictures at print size, 300 dpi for cards, flyers, labels and boxes; 150–200 dpi for large posters and banners.
- For cards and paper products, a picture below 150 dpi blocks the order (Resolution too low for print), below 200 dpi you get a warning (Low resolution), and 300 dpi is recommended. Large formats use lower values, which the app applies for you.
- The fix buttons offer to shrink the picture to a size it can print at, to Enhance quality with AI, or to Replace the picture with a larger file.
What the print PDF contains
- The bleed, with the trim and bleed boxes set for the print shop.
- Text converted to curves (vector outlines), so no font can go missing at the printer.
- Text, shapes, QR codes and barcodes as vectors, so they stay sharp.
- Pictures at full resolution, without the preview mark.
Colours are kept in RGB as designed. If you print elsewhere and colour matters, ask your printer how they convert to CMYK and for a proof. The download also includes a README with these instructions. See Download the clean files.
Screens and prices in the pictures are examples; the app always shows the current price before you pay.
Written for the app as of 2026-10-27.