

Checking for print
Preview, 3D view, print check and approval
Before anything is printed, you see your design as it will be made, the app checks it for print problems, and you approve it. This guide explains each of these steps.
In this guide
Previews are marked
While you design, AI pictures and gallery backgrounds carry the word PREVIEW and are shown at a lower resolution. Your own uploads, texts, colours, logos and codes are not marked. The clean, full-resolution files come only with a paid download or a paid print order, and they never carry the mark.
See it in 3D
Step 1: Open the 3D view
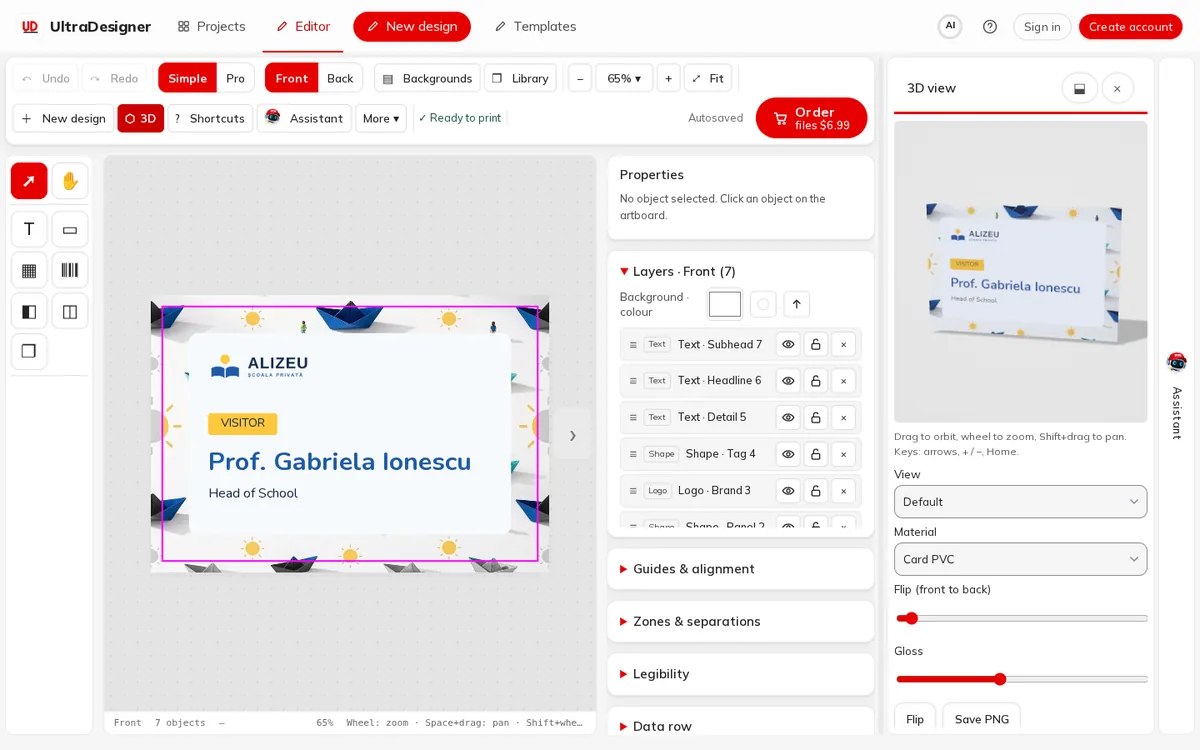
Click 3D in the editor toolbar. The 3D view opens beside the design and follows every change you make.
Step 2: Look around
Drag to orbit, use the wheel to zoom and Shift + drag to pan. Choose a View and a Material, use the slider to flip from front to back, then Flip or Save PNG.
Fix what the print check finds
Step 3: Watch the check in the toolbar
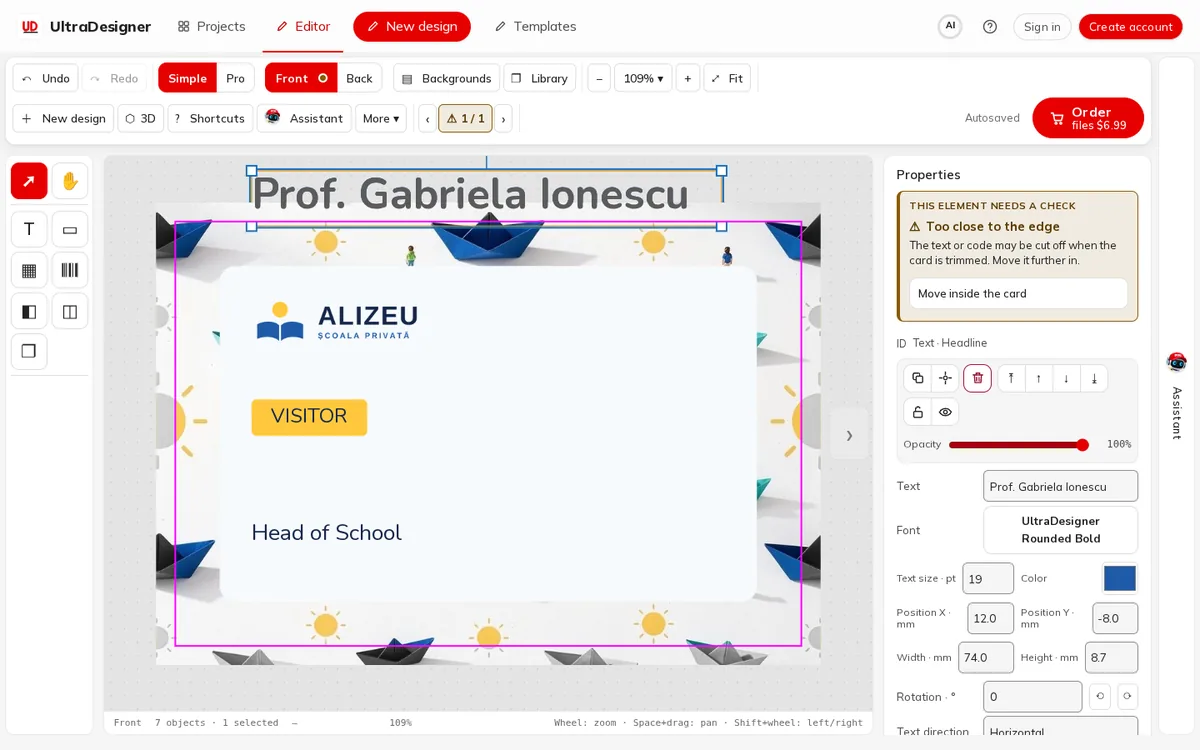
The toolbar shows ✓ Ready to print when the check finds nothing. Otherwise it shows a warning sign with the number of things to check; click it to jump to the next one, and use ‹ › to move between them.
Step 4: Read the finding
The selected object gets a box at the top of Properties: This element needs a check, with the problem and what to do. Here, the headline was moved too close to the edge: Too close to the edge.
Step 5: Use the fix button
Most findings have a fix button, such as Move inside the card, Replace the picture or Enhance quality. You can also ask the assistant with Help me fix these.
- A red finding blocks printing until it is fixed; when you order, the app says The design can't be ordered yet. Fix this in the editor:.
- An amber finding is a warning: Worth a look (you can still order):.
- Typical findings: Resolution too low for print, Low resolution, Too close to the edge, Not visible on the card, Code without content and Font not available for print.
Approve the design for print
When you order a print, the order window shows your design and runs the check once more (Checking the design for print…). Before you can pay, you tick: I have reviewed the design above and approve it for printing exactly as shown. Any later change needs a new approval.
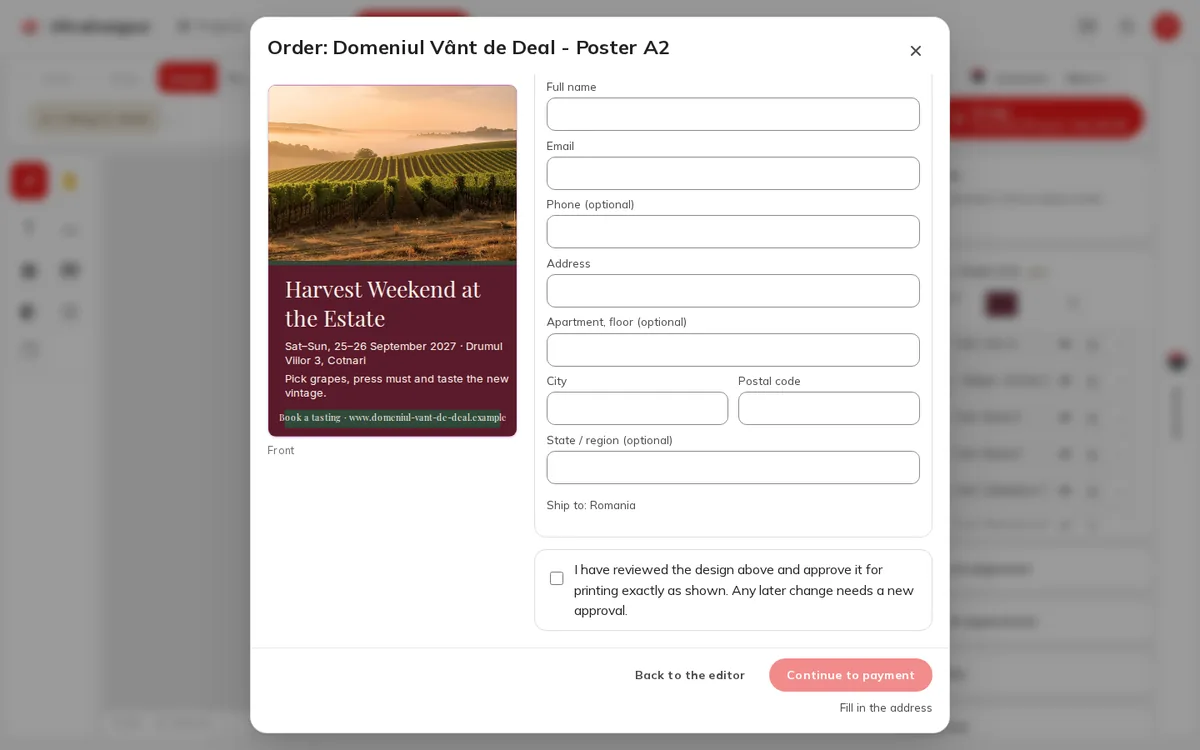
This approval is tied to the exact version of the design you saw. If the design changes after you approved it, the app stops the order: The design changed after approval. Close this and order again from the current design. That way, what is printed is always what you approved.
A download of the files needs no approval: you get exactly the version you paid for.
Screens and prices in the pictures are examples; the app always shows the current price before you pay.
Written for the app as of 2026-10-27.