

Designing
Edit text, fonts and colours
Every text on a design is a separate object that you can select and change. The app never rewrites your wording: what you type is what is printed.
Change a text
Step 1: Select the text
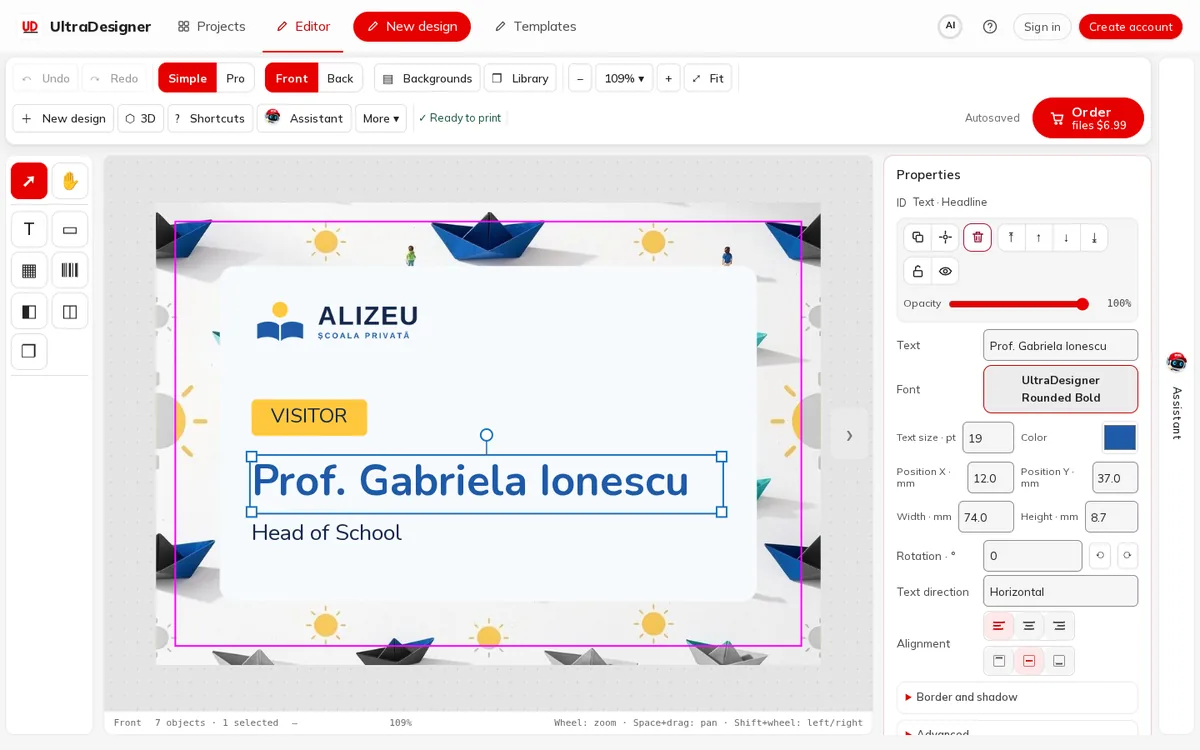
Click the text on the design, or its row in the Layers panel. A frame with handles appears around it and Properties shows its settings.
Step 2: Change the wording
Type in the Text field. The design updates as you type.
Step 3: Pick a font, size and colour
Click the Font button to open Choose a font and pick one; all fonts in the list can be printed. Set Text size in points and click Color to choose a colour.
Step 4: Align and place it
Use Alignment (left, centre, right; top, middle, bottom) inside the text box. Position X, Position Y, Width and Height are in millimetres; Rotation in degrees. Text direction can be horizontal, vertical or stacked letters.
Add a new text
Click the T tool on the left rail (its tooltip is + Text). A new text appears on the current side; change it as above. To remove a text, select it and press Del or use the bin button in Properties.
Order, lock and hide
The buttons at the top of Properties let you Duplicate, centre, Delete, Bring forward, Send backward, Bring to front and Send to back, change the Opacity, lock the object and hide it. The same actions are in the Layers panel. See Pictures, backgrounds and layers.
Keep text readable and safe
Screens and prices in the pictures are examples; the app always shows the current price before you pay.
Written for the app as of 2026-10-27.