

Designing
Editor basics: toolbar, tools, zoom and sides
The editor is where you change everything on your design. This page explains what is where, so the other guides are easy to follow.
In this guide
The screen at a glance
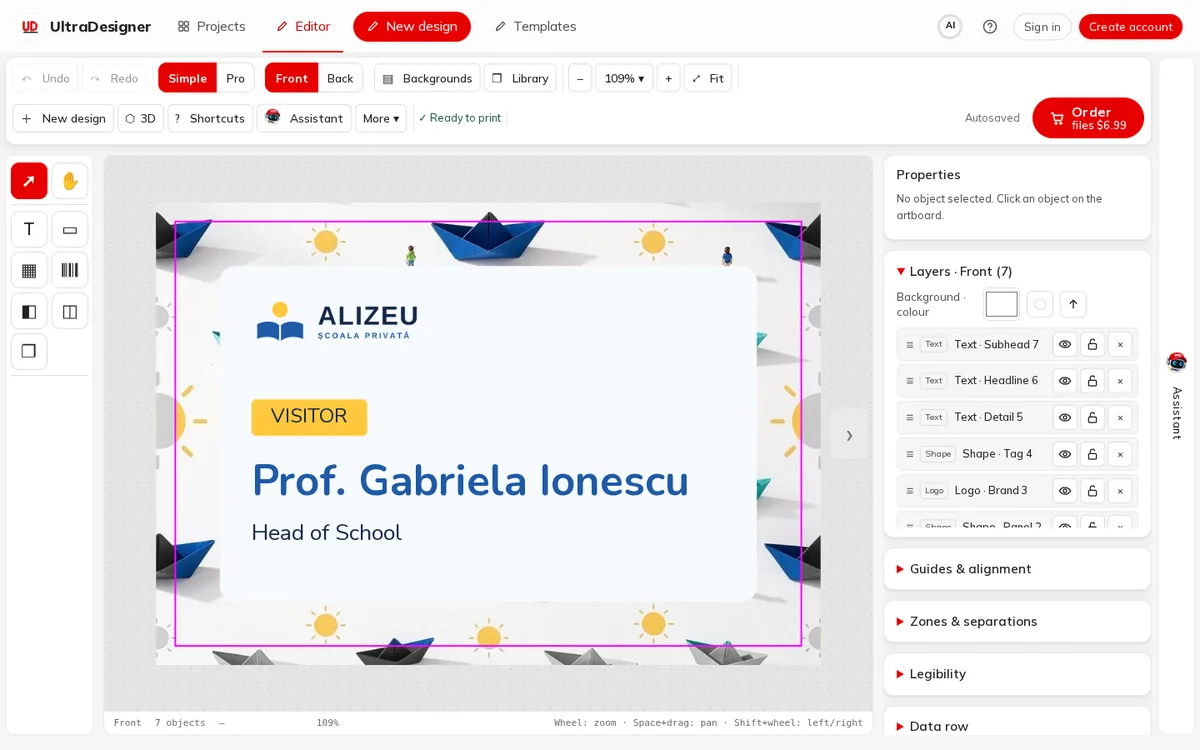
- At the top, the toolbar: Undo and Redo, the Simple / Pro switch, Front and Back, Backgrounds, Library, zoom, New design, 3D, Shortcuts, Assistant and More.
- On the right of the toolbar, the print check (✓ Ready to print or the number of things to check), the save state (Autosaved) and the Order button.
- On the left, the tool rail: select, hand (pan), text, shape, QR code, barcode, ID photo and the library. Hover a tool to see its name.
- In the middle, the design. The magenta line is the cut line, where the product is trimmed; keep important text well inside it.
- On the right, Properties (the selected object) and Layers (everything on the current side), then Guides & alignment and other panels.
Simple and Pro
The editor opens in Simple mode, with the tools most people need. Pro adds the paint bucket and eyedropper, working colours, blocks, symbols, a format control and the Bleed, Trim, Safe area and Rulers toggles. The app remembers your choice.
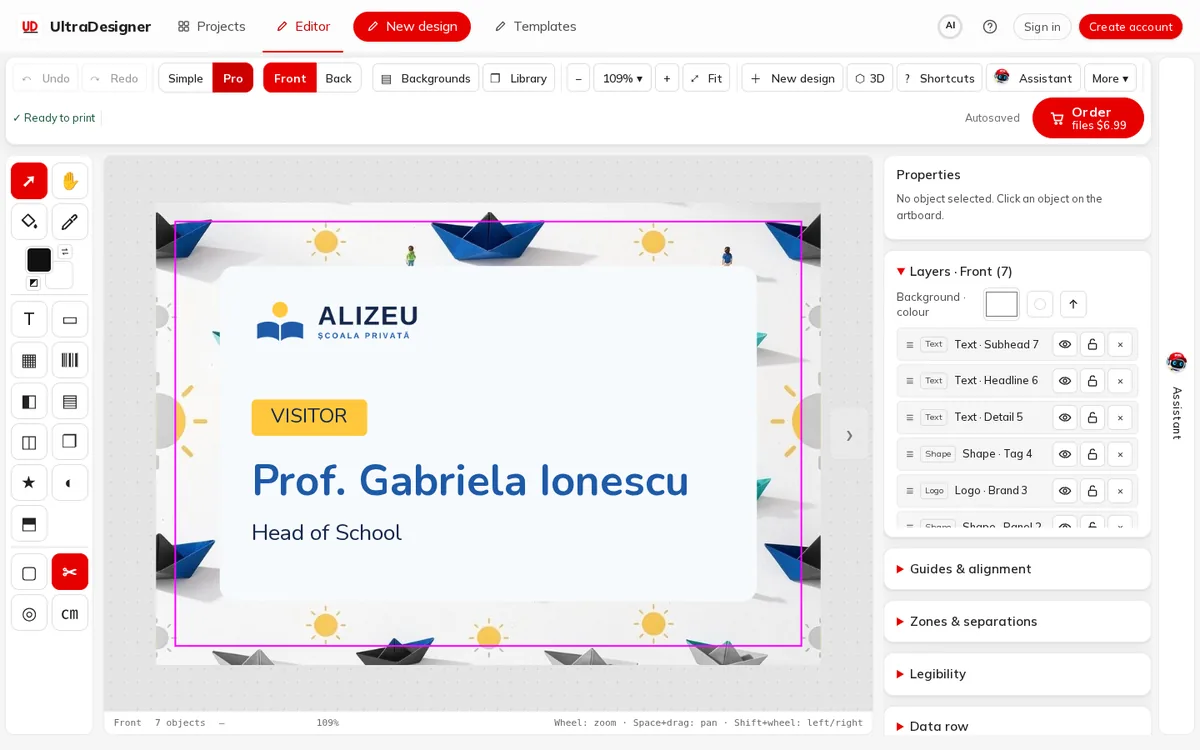
Zoom, pan, undo
- Zoom with Zoom in and Zoom out (the + and − buttons), the percentage menu (Fit, Zoom to selection, 50 to 400 %) or the mouse wheel.
- Move around with the hand tool, or hold Space and drag. Shift + wheel scrolls left and right.
- Undo (Ctrl + Z) and Redo (Ctrl + Shift + Z) step back and forward through your changes.
Front and back
Products printed on two sides have a Front and a Back. Switch with the buttons in the toolbar; the Layers panel always shows the side you are on. Whether a product is printed on one or two sides is chosen with Sides in the catalog (see Choose a product).
Keyboard shortcuts
| Keys | What it does |
|---|---|
| Ctrl + Z | Undo |
| Ctrl + Shift + Z | Redo |
| Del | Delete selection |
| Arrows | Move by 1 mm |
| Shift + arrows | Move by 5 mm |
| Alt + arrows | Resize by 1 mm |
| ] | Bring forward |
| [ | Send backward |
| Shift + click | Add to selection |
| Esc | Close / deselect |
| V | Select tool |
| H | Hand (pan) |
The Shortcuts button in the toolbar shows the full list, including the Pro tools.
Saving
There is no save button: every change is saved automatically and the toolbar shows Autosaved. Without an account the design is kept in this browser; with an account it is also saved to the cloud. See Create an account and save your projects.
Screens and prices in the pictures are examples; the app always shows the current price before you pay.
Written for the app as of 2026-10-27.